


 & HDD (Hard Disk Drive)?")


In today’s world of connectivity, keeping your WiFi network secure is crucial. One key aspect of WiFi security is regularly updating your password. Whether you’re protecting your home network or strengthening your business setup, knowing how to change your WiFi password is essential. Brands like D-Link, TP-LINK, Netgear, Apple AirPort, Asus, Belkin, Buffalo, Trendnet, and Zyxel all follow a similar process, though with some variations.
Thankfully, technology has evolved to make changing your WiFi password easy and accessible. You can do it from your desktop, laptop, or smartphone with seamless integration. Thanks to user-friendly interfaces and intuitive software, the once daunting task of changing your WiFi password has become much simpler.
By understanding the nuances of each router’s interface, we can guide you through the settings to ensure your WiFi remains secure. Whether you’re dealing with the detailed menus of a D-Link router or the sleek design of an Apple AirPort, we’re here to help. Join us as we unravel the mysteries of WiFi security and empower you to take control of your digital domain.
When you unearth an ancient relic depicting an Egyptian holding a WiFi router and realize… even the pharaohs struggled with WiFi password changes! 🤷♂️📶
How To Change WiFi Router Password?https://t.co/yHkidDtO1i#TechTantrum #TechMeltdown #WiFiStruggles #PasswordMaze pic.twitter.com/0iZqnuQIP0
— deskdecode (@deskdecode) March 5, 2024
So Let’s See How to Change It
To kickstart the process of changing your password, you’ll need to follow three key steps, each essential for ramping up your network’s security:
- Connect to WiFi: First things first, get yourself connected to your WiFi network. This ensures a secure link to your router’s interface, setting the stage for smooth sailing through its settings.
- Access Router Settings UI Page: Once you’re connected, dive into the depths of your router’s administrative settings. This usually involves firing up a web browser and typing in your router’s IP address into the address bar.
- Change the Password and Save Settings: With the UI page open in front of you, navigate to the section dedicated to password management. Here, amidst a sea of settings, you’ll find the option to tweak your WiFi password. Once you’ve crafted the perfect code, hit the button to save the settings, locking in your network’s newfound fortification.
By diligently following these three steps, you’re not just beefing up the defenses of your WiFi network, but also fostering a digital haven where connectivity flourishes under the watchful eye of a reinforced password.
So, let’s start with the first one:
Step #1: Connect To WiFi
So, you’re ready to dive into the wild world of WiFi settings, huh? Well, first things first – you gotta get your computer cozy with that router of yours. This step is like the key to the kingdom because all the magic settings live inside that little box.

Now, when you’re staring at your computer screen, scratching your head, wondering how to make this connection happen, you’ve got a couple of routes you can take. Option one: good old reliable LAN cable. It’s like the tried-and-true handshake between your device and the router—solid and stable. Or, if you’re feeling fancy, you can tap into your device’s WiFi skills and go wireless. Because who doesn’t love the freedom to wander while staying connected?
But what if you’re wrangling with just a smartphone? No worries, my friend. You can still get in on the action. Just swipe your way to your phone’s WiFi settings, and voilà! Connect to your router’s network using your phone’s WiFi powers. It’s like creating a little invisible bridge between your phone and the router, giving you the power to change passwords with a flick of your thumb.

In case, if you’re scratching your head trying to recall the old password for your WiFi network, don’t sweat it—there’s a lifesaver built right into your router. It’s called the reset button, and it’s like a magical reset switch that can wipe out all your settings and take you back to square one.
To work this digital wizardry, just hunt down that reset button on your router. It’s usually hanging out on the back or side, trying to blend in with the scenery. Once you’ve located it, channel your inner wizard and press and hold that button for about 5 to 10 seconds. It’s like giving your router a little wake-up call from its techy nap.
As you hold down the button, you’ll start to feel like you’re witnessing a mini-miracle as your router’s gears start churning. And before you know it, poof! Your router has gone back to its factory settings, fresh as a daisy. With the reset done, your router is reborn and ready for action. It’s like hitting the restart button on your whole network, giving you a clean slate to start over with your configurations.
Step #2: Access Router Settings UI Page
Once you’ve successfully linked up your laptop or mobile device to your WiFi network, the next big move is uncovering the gateway IP address. Think of it as the secret doorway to your router’s Settings UI Page. This web page, tucked away inside your router’s digital domain, is like the control center for all sorts of setup tweaks—from tweaking passwords to beefing up security and more.

Now, the hunt for this gateway IP address varies depending on which operating system you’re using. So, let’s break it down step by step for each:
- How to Find the Gateway IP in a Windows Computer or Laptop:
- Make sure your computer is hooked up to the router.
- If it is, summon the “command prompt” by pressing Windows + R keys.
- Type in “cmd” and hit enter.

- In the command prompt, type “ipconfig” and press enter. You’ll see your wireless network’s gateway IP address pop up. If you’re connected via LAN cable, the default gateway IP will be displayed under the Ethernet adapter section in CMD.

- How to Find the Gateway IP in a Mac PC or Laptop:
- Click on the Apple menu button in the upper-left corner of your screen.
- Select System Preferences.
- In System Preferences, choose “Network.”
- Pick the network adapter you’re using, and the IP address will show up in the right-hand pane.

- How to Find the Gateway IP in an Android Phone or Computer:
- Go to Settings on your Android device.
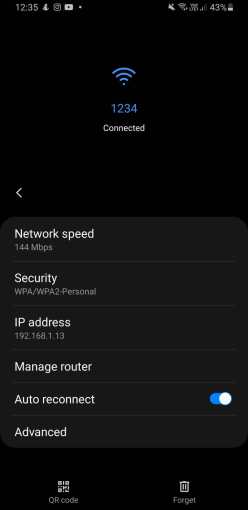
- Navigate to WiFi settings.
- Connect to your WiFi network if you haven’t already.
- Now Tap on the connected network settings and the IP address displayed on your phone is the one your router assigned. Usually, just changing the last digit to “1” will get you your router’s main gateway IP.
- How to Find the Gateway IP in an iOS Phone:
- Open Settings on your iOS device.
- Select WiFi.
- Choose your network if it’s not already selected.
- Now tap on the information icon and Boom, your router’s IP address will pop up.

- Or otherwise, here’s a list of the default gateway IP addresses of some WiFi manufacturers:
- Linksys – 192.168.1.1 or 192.168.0.1
- Netgear – 192.168.0.1 or 192.168.0.227
- ASUS – 192.168.1.1
- D-Link – 192.168.0.1 or 10.0.0.1
- Apple – 10.0.1.1
- Buffalo – 192.168.11.1
#Now, It’s Time To pen Router Settings UI Page
Now that you’ve got your hands on the gateway IP address, it’s time to unlock the doors to your router’s inner sanctum. Picture yourself as a digital explorer, ready to navigate through the virtual landscape with the trusty browser on your computer or phone.
With a tap of your keyboard or touchscreen, enter that gateway IP address into your browser’s address bar. It’s like punching in the secret code to open the gates to a new realm.
As you hit enter, brace yourself for the sight of the coveted configuration page. This is where the magic happens – where you can tweak settings and make your router dance to your tune. But hold on tight, because before you can waltz in, you’ll need to prove your identity with a username and password.
But don’t panic! You’ve got the keys to this kingdom. Just type “admin” into the username field, and either “admin” or “password” into the password field. These are like the golden tickets that let you bypass the bouncer and enter the VIP section of your router’s settings.
Now, if by some twist of fate, those credentials don’t work, don’t throw in the towel just yet. Take a peek at the sticker on your router – it’s like a treasure map leading you to the hidden codes. Somewhere in that maze of numbers and symbols, you’ll find another gateway IP or maybe an alternative username and password, waiting patiently to be discovered.
With a bit of perseverance and a touch of ingenuity, you’ll navigate through this digital labyrinth and unlock the doors to a world of possibilities. So, armed with your newfound knowledge and fueled by your spirit of exploration, go forth and conquer your router’s settings like the tech-savvy adventurer you are!
now, let’s move on to;
Step #3: Changing Password & Saving Settings

As you stand before the gateway to your router’s configuration page, a world of possibilities unfolds before you. Your mission: change that password and fortify your WiFi network against potential intruders.
First things first, find your way to the wireless settings tab nestled within the configuration page. This is where the magic happens – where you can give your network a new name and, of course, a new password. Take hold of the reins and embrace the power to shape your digital domain.
Among the array of security options, I highly recommend opting for the “WPA2 & WPA3” security protocol. This powerhouse combo not only beefs up your network’s defenses against hackers but also offers top-notch protection like no other. With this setup, your network becomes a fortress against digital threats, offering you peace of mind in today’s ever-evolving cyber world.
Once you’ve fine-tuned your security settings to your liking, seal the deal by saving your changes. With a simple click, your network gets a boost of strength and resilience, ready to take on whatever comes its way. But we’re not done just yet.
In a symbolic gesture, give your modem a restart. It’s like hitting the refresh button, wiping the slate clean and ushering in a fresh start for your network. With each reboot, your network gets a new lease on life, ready to tackle the challenges and triumphs of the digital realm.
So, with your settings saved and your modem rebooted, take a moment to bask in the satisfaction of a job well done. Your WiFi network has undergone a transformation – it’s now stronger, more secure, and ready to take on the world. Armed with fortified defenses and a renewed sense of purpose, step into the digital frontier with confidence, knowing that your network stands tall as a beacon of resilience in a sea of cyber uncertainties.
Me after successfully changing the WiFi password for the first time… Who's the WiFi boss now? 💃💪🎉🔒
How To Change WiFi Router Password?https://t.co/yHkidDtO1i#PasswordPro #TechDanceParty #RouterRevamp #DIYChampion #TechGuru pic.twitter.com/EzWhpIjWqA
— deskdecode (@deskdecode) March 5, 2024
How To Change WiFi Password In D-Link WiFi Router
For those venturing into the labyrinth of D-Link WiFi routers, changing your WiFi password is a crucial task in securing your digital territory. Here’s a step-by-step guide to effortlessly achieve this goal:
- Begin your digital quest by opening your preferred web browser on your computer or mobile device. Enter one of the following URLs into the address bar: “192.168.0.1”, “http://dlinkrouter“, or “http://dlinkrouter.local“.
- As you navigate through the digital realm, you’ll encounter the gateway to your router’s configuration page, prompting you for authentication. Enter the default username, which is “Admin”, and leave the password field empty. Click on the Login button to proceed.

- Once you’ve gained access, head to the Setup tab at the top of the interface. Here, a plethora of options awaits your command. Direct your attention to the left side panel and select Wireless Settings.
- Within the interface, locate and click on the “Manual Wireless Network Setup” button. This action marks the beginning of your journey towards changing the password.

- Scroll down the page until you reach the “Wireless Security Mode” setting. This is the fortress of your network’s security, where you’ll adjust your WiFi password.

- With determination, devise a new passphrase, imbuing it with strength and resilience. Once crafted, click on the Save Settings button at the top of the page to finalize your decree.
How To Change WiFi Password In TP-Link WiFi Router
In the vast world of TP-Link WiFi routers, changing your WiFi password is a crucial step to keep your digital fortress secure. Here’s a handy guide to walk you through it:
- Let’s kick off this adventure by connecting your computer to the TP-Link router. You can do this by plugging in an Ethernet LAN cable into one of the LAN ports on the router’s back panel. Or, if you prefer going wireless, just use the WiFi on your laptop or phone.
- Once you’re physically linked up, fire up your web browser and type in one of these URLs: “http://192.168.1.1“, “http://192.168.0.1“, or “http://tplinklogin.net“. These are the gateways to your router’s setup page. If the first URL doesn’t work, try the others. Note: The LAN IP address might differ depending on your TP-Link router’s model number. You’ll usually find this info on a sticker on the bottom of your router.

- After breaking through the digital barrier, you’ll land on the router’s login page. Just punch in the default username and password, which are both “admin”. This will get you into the router’s inner sanctum.

- Head over to the Wireless settings section, specifically the Wireless Security page. This is where you’ll find the magic button to change your WiFi password. Locate your current password under the security protocol you chose before.

- Now, with steady hands and unwavering determination, go ahead and change your password to something you’ll remember. Once you’ve done that, hit the Save button to lock in your changes. To make sure everything sticks, give your router a reboot.

How To Change WiFi Password In Netgear WiFi Router
In the world of Netgear WiFi routers, changing your WiFi password is a top priority to keep your digital stronghold secure. Follow these step-by-step instructions to navigate this process smoothly:
- Start your digital journey by opening your internet browser and typing “www.routerlogin.net“ into the address bar. If this doesn’t work or you encounter an error, try alternative URLs like “www.routerlogin.com“, “http://192.168.0.1“, or “http://192.168.1.1“.
- Once you’re at the digital gateway, enter the router’s username and password when prompted. Typically, the default credentials are “admin” for the username and “password” for the password.
- As the virtual doors open, head to the “Wireless Settings” option under the “Setup” menu. This is where you’ll change your WiFi password.

- Take a good look at your current password displayed on the screen. Embrace the chance to create a new, secure passphrase.
- After crafting your new password, click “Apply” to save all changes securely. If you’re using WEP security, it’s highly recommended to switch to the more secure “WPA2-PSK (AES)” setting. This robust protocol shields your network from potential threats, ensuring peace of mind in the digital world.
Note: Smartphone users can also modify their password easily. Just use the NETGEAR iOS, Android, or Desktop “genie app” to change your WiFi password effortlessly, keeping connectivity right at your fingertips.
How To Change WiFi Password In Apple AirPort WiFi Router
In the world of Apple AirPort WiFi routers, changing your WiFi password is a crucial task to maintain the security and reliability of your digital domain. Follow these detailed steps to navigate the process smoothly:
- Start your journey by accessing the “Utilities” option, typically located within the “Applications” section of your Mac hard drive.
- Within the Utilities folder, find and double-click on the “AirPort Utility” icon. This will launch the AirPort configuration program, which will automatically scan for nearby AirPort wireless routers.
- From the list of detected routers, choose your Apple AirPort wireless router. Once selected, navigate to the bottom of the screen and click on the “Manual Setup” option
- With access to the manual setup interface, look to the top of the screen and select the “Wireless” tab. This is where you’ll find the option to change your WiFi password.
- With determination, enter your new WiFi password into the designated “Wireless password” field. Double-check for accuracy by re-entering the password in the “Verify Password” field.
- Once you’ve woven the essence of security into your new password, seal the deal by clicking on the “Update” button. This will save all the settings, ensuring that your WiFi network remains fortified and secure.
How To Change WiFi Password In Asus WiFi Router
Changing your WiFi password on an Asus router is about as tricky as buttering toast – that is to say, not tricky at all. Here’s the lowdown on how to get it done without breaking a sweat:
- Fire Up Your Browser: First things first, fire up your trusty web browser, whether you’re on your computer or thumb-tapping away on your mobile device.
- Log into Your Router: Type in this magic number in your browser’s address bar: 192.168.1.1 Boom, you’re in! Just use the default username and password, which are usually both set to “admin”.
- Dive into Router Settings: Now that you’re in the belly of the beast (aka the router’s web interface), find the image or picture of your router. Give it a cheeky little click to reveal more options.

- Tweak Your WiFi Settings: Clicking on that picture unlocks the treasure trove of WiFi options on the right side of the page. Hunt down the option to change your WiFi password or passkey, then type in your fancy new password.
- Hit the Button: Once you’ve flexed your password-changing muscles and typed in the new secret code, hit that “Apply” button like it owes you money. This ensures your new password gets locked in nice and snug.
- Give Your Router a Nap: Last but not least, give your Asus router a well-deserved nap by rebooting it. This ensures all your changes kick in properly and your network is now guarded by your shiny new password.
How To Change WiFi Password In Belkin WiFi Router
Here’s a more casual take on changing your Belkin WiFi router’s password, making sure your network stays as secure as Fort Knox:
- Get Wired Up First off, grab a LAN cable and hook your computer up to the Belkin router. It’s like plugging in your headphones – just a bit more techy.
- Dive into Settings Next, fire up your favorite web browser and type in 192.168.2.1 in the address bar. Hit Enter, and you’ll be whisked away to the magical land of your router’s web-based setup page.

- Crack the Code Now, look for the “Login” button at the top of the page and give it a friendly click. If you haven’t set a password before, it’s usually left blank. But if you have, just use that to get into the main router settings.

- Spruce Up Your WiFi Once you’re in, head over to the wireless tab on the right side and find the “Security” option. Click on that bad boy, and you’ll be in the WiFi settings section. This is where the magic happens – swap out your old password for a shiny new one. Don’t forget to save your changes before you go strutting off!

How To Change WiFi Password In Buffalo WiFi Router
How To Change WiFi Password In Trendnet WiFi Router
Here’s a simplified guide to changing your Trendnet WiFi router’s password, ensuring your network is as secure as a fortress:

- Log in Like a Boss First things first, fire up your web browser and type in either “http://tew-752dru” or “http://192.168.10.1“ in the address bar. Hit Enter, and you’ll land on your router’s login page. If there’s a pre-set password, check the sticker on the back of your router for it.

- Username and Password Dance Once you’re at the login page, it’s showtime! Enter your username and password, then pick your preferred language. Click that Login button like you mean it.
- WiFi Wonderland Now, you’re in the router’s lair. Head over to the “Wireless” section, then click on “Basic”. That’ll open up the magical WiFi configuration page where all your dreams can come true.

- Password Makeover Time to give your WiFi password a facelift. Find the spot to change the password and type in your new, super-secret code. Make sure it’s strong like a bull to keep those sneaky cyber critters out.
- Seal the Deal Don’t forget to save your changes! Look for the “Save” or “Apply” button on the page and hit it like it owes you money. That’s it – you’re done! Your network’s now locked down tighter than Fort Knox.
How To Change WiFi Password In Zyxel WiFi Router
Here’s a user-friendly guide to changing your Zyxel WiFi router’s password to beef up your network security:
- Open Your Web Browser: Grab your computer or mobile device and fire up your web browser. Type in http://192.168.0.1 in the address bar and hit Enter.
- Access Wireless Setup: Once you’re on the router’s configuration page, look for the “Wireless Setup” option in the main menu. Click on it to dive into the wireless configuration settings.

- Navigate to Wireless Security: In the wireless setup menu, hunt down and click on “Wireless Security”. This is where all the magic happens in terms of securing your WiFi network.

- Select SSID: Now, it’s time to pick the SSID (Service Set Identifier) that matches your WiFi network’s name. Usually, it’s pretty obvious which one to choose.

- Modify Password: Inside the settings for your chosen SSID, you’ll find the option to change your password. Go ahead and type in your shiny new password in the designated field.

- Apply Changes: Don’t forget to seal the deal! Hit that “Apply” button to save your changes and lock in your new password. This ensures your network is safeguarded with the updated password.
Suggested Articles:
- How To Setup A Modem From Telephone/ISP Line?
- Setup Two Or More Computers Via LAN For Files Sharing In Windows
- Network Error “Windows Cannot Access \\ Shared Drive” – What To Do?
- What Is Dual-Band WIFI And Its Types? – 2.4 GHz vs 5 GHz


The password for the router can be changed from the laptops or computers by easily accessing to the page of the WiFi connection settings where there is option of changing the password. Changing the password is necessary for the security of the network.