


 & HDD (Hard Disk Drive)?")


RAM (Random Access Memory), my friend, is the real unsung hero in the tech world. It’s that super-speedy data holder that keeps your computer’s processor on its toes, enabling seamless multitasking like a pro juggler at a circus.
So, Whether you’re aiming to juggle multiple apps like a pro or simply want your system to zip through tasks, grasping the fundamentals of RAM installation sets the stage for confidently boosting your laptop’s performance. And the best part is that knowing the ins and outs of installing RAM on your trusty laptop is like giving it a VIP upgrade.
Now, let’s get hands-on and explore the magical world of this hardware upgrade—it’s about to get geeky, but fear not, we’re navigating through this maze together!
# But First Things First
Before diving into the nitty-gritty of RAM upgrade, it’s vital to ensure it’s really needed. Checking if your laptop is acting sluggish, crashing often, or freezing can signal a cry for more RAM power. Take a good look at how you use your laptop; if you’re running big programs or doing lots at once, it might be time for an upgrade.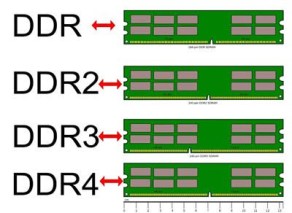
But hey, even if an upgrade is a go, picking the right RAM is key. You’ve got to match the type, speed, and capacity of the existing RAM with the new one. Mixing up these specs can lead to a grumpy laptop; it might start acting wonky, crashing, or worse, it could harm the hardware itself.
- RAM Upgrade – Why, How, and How Much?
- How Much RAM Do We Need In Our Devices?
- Finding – What Type Of RAM My Computer Support Or Have Installed?
- How To Buy Perfect RAM Stick For Laptop & Desktop Computers?
- List Of Top & Best RAM Available In The Market – Recently Updated
Let’s See How to Install a RAM Stick in a Laptop
The initial step in installing RAM is ensuring your laptop is completely powered down, not just dozing off or taking a nap. Gotta make sure no electrical shenanigans mess up the installation gig. Unplugging that power adaptor is key to cut off any juice flow to the laptop.
Now, for those laptops with batteries you can pop out, it’s time for some battery acrobatics. Find that battery latch or check the manual for a safe breakup procedure.
But if your battery’s playing hide-and-seek, you might need to crack open the entire back case. Once you’re in, delicately unplug the battery connection from the motherboard. Remember, different laptops, different dances. For those non-removable battery types, getting to and separating the battery connection from within requires serious ninja moves to avoid messing up any internal gear.

Now flip that laptop over and behold it’s underbelly. That’s where the magic happens. You’re on the lookout for a small, sneaky panel secured by screws—that’s your gateway to the inner sanctum, aka the memory module cover.
What you’re scouting for is a dainty, rectangular or square-shaped cover showing off some cool symbols like “RAM,” “M,” or maybe even a memory icon. This panel is your ticket to the memory slots without having to tear apart the entire laptop casing.

Next step: check if there are screws or sneaky latches holding that cover in place. Whip out your trusty screwdriver or follow the manufacturer’s manual – you know the drill. Unscrew those screws or gently release the latches. Some covers might have tricky tabs that need a gentle nudge or a specific slide to open. Once you’ve cracked the code and removed the cover, voila! The memory slots and the existing RAM modules are there, ready for a makeover.
If you’ve already opened up your laptop’s back cover to disconnect the battery connector and still can’t find the RAM slots, chances are they’re hiding under the keyboard.
To get to these sneaky RAM slots under the keyboard, you’ve got a different mission ahead. First up, say hello to some screws that hold the keyboard in place. They might be under the laptop or cleverly tucked beneath rubber feet, so get ready for a little treasure hunt.
Once you’ve tracked down and unscrewed them, it’s time to delicately pry the keyboard loose. Use something flat and not metal to avoid causing any damage. Lift it up gently, keeping an eye out for any ribbon cables connecting it to the motherboard. If you spot any, carefully disconnect them by unlocking the connectors and gently pulling them out.

Now, onto the next stage: swapping out the old RAM for shiny new ones. And guess what? If there’s an extra slot just chilling there, you’ve got the option to boost that memory even further.
To say farewell to the old RAM, your target’s the retention clips flanking the memory module sockets. These little clips play bodyguard to your RAM sticks. Gently push or pull them away from the RAM sticks until you hear a soft click or see them move away from the modules.

Once those clips release their hold, the RAM module will slightly tilt upwards thanks to its spring-loaded setup. Now, with a steady yet gentle grip on the sides of the RAM stick, carefully lift it upward out of the socket. Go for a straight, up-and-down movement without going Hulk-style on it—no excessive force is needed to avoid any RAM or socket mishaps.
Now, the moment has come to install the gleaming new RAM stick;
Let’s get that RAM stick in the right position first. Check for a notch on the RAM module—it’s got to line up with a groove or little slot in the socket. This match-up is crucial because it only lets the RAM go in one direction, avoiding any installation mix-ups.
Now, grab that RAM stick and tilt it at about a 45-degree angle. Gently slide it into the slot—nice and easy, no need to force it. Make sure it’s snug and smoothly sliding. Once it’s in the right spot, push the RAM stick straight down into the slot. Listen up for a solid click or feel it lock in—those clips on either side of the slot are keeping things tight.

Remember to treat that RAM like it’s delicate glass; handling it with care ensures a smooth transition from old to new in your laptop’s memory world.
Now safely put that memory cover back on, making sure the screws are snug but not crazily tight. Then it’s battery time! If you popped out the battery earlier, gently put it back following the manufacturer’s instructions or by reconnecting the battery connection.
With everything back in place, power up your laptop to test-drive that shiny new or upgraded RAM. As it boots up, don’t freak out if you see a message on the screen talking about a memory change. It might say something like “The amount of memory has changed” or a similar heads-up from the system BIOS or UEFI. That’s just the laptop acknowledging the RAM switcheroo, telling you the change was recognized.

Once your operating system kicks in, double-check the new RAM’s recognition and usage. You can peek at the system properties or task manager to confirm the total RAM installed. It’s like giving your system a quick memory check-up to ensure everything’s running smoothly.

Crucial tips
Before you even think about taking a screwdriver to your laptop, it’s a smart move to hit up YouTube for a detailed disassembly video tailored to your laptop’s specific model. Just punch in your laptop’s model number and voila! You’ll find some nifty and accurate videos showing you the whole disassembly shebang.
These videos are gold—they walk you through each step, revealing all the ins and outs of cracking open your laptop, finding the hidden treasures inside, and doing things like installing RAM. Watching these visuals gives you a heads-up on what to expect, like tricky screws, delicate connectors, or any special moves your laptop model demands.
Trust me, it’s like having a backstage pass to your laptop’s internal world. So, before you get your hands dirty, tune in to these videos for some valuable tips and tricks!

When you’re tinkering with delicate computer bits like RAM or doing any inside-the-laptop upgrades, don’t forget your superhero gear—a.k.a., the anti-static wristband. These wristbands are like shields against a sneaky enemy called static electricity.
See, static electricity can silently build up on your body and sneakily zap those fragile computer parts, causing serious damage that can’t be undone. But fear not! The anti-static wristband swoops in to save the day. It keeps you grounded, diverting any static charge away from the components and protecting them from harm.
Using one’s a piece of cake. Just slap it around your wrist and make sure the metal clip or plate on the band gets cozy with something grounded, like the laptop’s metal chassis or any grounded surface. That connection makes a safety route for any static charge hanging out in your body, keeping your laptop parts safe and sound.
Remember, it’s like wearing armor for your laptop parts—keep them safe from the sneaky static electricity!

Need a RAM, anti-static wrist strap, or screwdriver kit?
List of Top & Best RAM Avaiable In The Market – Recently Updated
Anti-static Wrist Strap Starts From: @Amazon US ($5.99), @Amazon UK (£4.99), @Amazon IND (₹99.00), @Walmart US ($6.99), @Newegg ($35.99).
Screwdriver Kit Starts From: @Amazon US ($9.99), @Amazon UK (£9.99), @Amazon IND (₹149.00), @Walmart US ($9.99), @Newegg ($10.99).
Suggested Articles


I could not refrain from commenting. Very well written!