


 & HDD (Hard Disk Drive)?")


So, you’re cruising through the vast digital ocean, and suddenly, bam! You hit a snag with the dreaded “ERR_CONNECTION_TIMED_OUT” message. Talk about a buzzkill, right?
Now, this error might seem like it’s speaking in some secret code, but fear not, for I’m here to decode it for you. Essentially, what it’s saying is, “Hey, we tried to connect to that website you wanted, but it’s like trying to call your friend who never picks up the phone—no luck”.
But why does this happen? Well, it’s a bit like a breakdown in communication between your device and the website’s server. You send out the call to load a webpage, but if that server doesn’t respond in time, your connection times out, and voila, you’re greeted with this error.
Now, there’s a whole bunch of reasons why this could be going down. It could be your network acting wonky, some firewall throwing shade, DNS issues—you name it. Even your own device might be part of the problem with its misconfigured settings or software throwing a tantrum.
Understanding this error is key to kicking it to the curb and reclaiming your online prowess. Trust me, it might start as a minor inconvenience, but let it linger, and it can really throw a wrench in your digital adventures.
So, buckle up as we dive into the nitty-gritty of troubleshooting. We’ll explore different strategies to tackle this error head-on and get you back to smooth sailing in the digital realm. Ready to conquer those connectivity conundrums? Let’s do this!
Quick Tip
When you hit a time-out network error while trying to visit a specific website, it’s crucial to realize that fixing the issue mostly falls on the shoulders of the website’s admin or webmaster. As a user, your hands are pretty tied—you can only report the error and cross your fingers for a quick fix from the folks in charge.
Knowing who’s responsible for what in this situation is key. Website admins have the tools and knowledge to dig into the backend stuff and sort out network errors efficiently. Meanwhile, us users are mostly left with the task of flagging the problem and then sitting tight for the website support team to swoop in.
Solution #1: Power Cycle
Power cycling, hailed as the superhero of tech glitches, is basically hitting the reset button on your electronic gadgets. When you’re grappling with the pesky time-out network error, power cycling swoops in to save the day by giving your network connection a refreshing reboot and tackling any temporary hiccups causing the chaos.
Here’s the lowdown: when you power cycle, you’re basically shutting down all the ongoing processes and wiping clean any temporary data caches. This can be a game-changer when it comes to fixing connectivity issues caused by software clashes, memory glitches, or network traffic jams.
Now, onto the steps:
- Shut down: Whether it’s your computer, phone, router, or modem, make sure it’s completely powered off. This gives any lingering processes a chance to bow out gracefully.

- Unplug: Cut off the power supply by unplugging your device from the socket or yanking out the battery if it’s an option. This ensures your gadget is totally out of juice, ready for a fresh start.
- Wait: Give it a breather for around 30 seconds to a minute. This downtime lets any lingering charges dissipate and ensures a proper reset.
- Reconnect and power up: Once the timeout’s over, plug your device back in and fire it up. Wait for it to boot up fully and establish a brand-new connection.
With a simple power cycle, you might just kick that “ERR_CONNECTION_TIMED_OUT” error to the curb without diving into complex network settings or troubleshooting manuals. But here’s the deal: while power cycling works wonders for temporary issues, it might not fix deeper hardware problems or persistent network woes. So, if the error sticks around, it’s time to roll up your sleeves and dig deeper into troubleshooting mode to get to the bottom of things.
Solution #2: DNS Flushing
Picture DNS flushing as hitting the reset button for your internet connection. It’s like tidying up your room by clearing out all the old clutter. In tech speak, it’s a process where you wipe the slate clean in your DNS (Domain Name System) Cache, which is essentially like an internet phone book.
Here’s the deal: when you visit a website, your gadget memorizes its domain name and corresponding IP address in this cache to speed up future visits. But sometimes, your device holds onto outdated or incorrect info in its DNS cache, leading to the network errors. It’s like trying to call your friend using an old number that doesn’t work anymore.
Why does this happen? Well, blame it on network changes or glitches. But fear not! Flushing the DNS cache is here to save the day. By giving it a good flush, you’re basically wiping out all that old data, so your device has to fetch fresh info from the DNS servers the next time you visit a website. It’s like hitting refresh on your browser, but for your internet connection.
Alright, let’s walk through how to give your DNS a good flush:
- Pop open Command Prompt: If you’re on Windows, just type “cmd” in the search bar and hit Enter. Mac users, find Terminal in your Applications folder or use Spotlight to search for it.
- Boss Mode Activate: Right-click on Command Prompt (or Terminal if you’re on a Mac) and choose “Run as Administrator” to make sure you’ve got the power you need.
- Type in the Magic Words: In that Command Prompt or Terminal window, type in these commands and hit Enter:
- For Windows:
ipconfig /flushdns
- For Mac:
sudo killall -HUP mDNSResponder
- For Windows:
- Wait for the Green Light: Once you’ve entered the command, keep an eye out for a message confirming that your DNS cache got the royal flush treatment.
- Give Your Browser a Little Nap: It’s like a mini-vacation for your browser. Close it down and open it back up again to let the changes sink in.
Voilà! Your DNS cache just got a makeover, giving your internet connection a fresh kickstart.
Solution #3: Check LAN Setting
Picture this: Your computer’s LAN settings suddenly go haywire, thanks to a sneaky virus or some sketchy software you’ve unwisely installed. Now, what do you do when your internet connection starts acting wonky? You gotta fix those settings pronto to get back online smoothly.
- First off, let’s dive into your Windows PC’s “Control Panel”. Once you’re in there, hunt down and give a click to the “Internet Options” icon.
- Boom! Clicking on “Internet Options” summons a nifty little pop-up window. Now, head over to the “Connection” tab nestled in that window.
- Now, in the “Connection” tab, look for the button labeled “LAN settings”. Clicking on that bad boy brings up another little pop-up window filled with checkboxes.

- To set things right, make sure to uncheck all those boxes. That’s your computer’s way of wiping out any shady configurations left behind by those pesky viruses or sketchy software.
- Once you’re done unchecking, hit “OK” to seal the deal and close those windows.
- Last but not least, give your computer a quick restart. This step ensures those changes stick and your internet connection comes back stronger than ever with the correct settings in place.
Solution #4: Check Hosts File
So here’s the deal with the Hosts file: it’s a little computer file that your operating system uses to match up website names (hostnames) with their corresponding IP addresses. Essentially, it’s like a handy reference guide for your computer to quickly find the right website when you type in a URL.
Now, why is this important? Well, the Hosts file can actually override the default information provided by your DNS (Domain Name System). So, if your computer checks the Hosts file first and finds a matching entry, it’ll use that instead of going out to the internet to look up the IP address.
But here’s the kicker: If some sneaky virus or malware gets into your system and messes with the Hosts file, it can cause some serious trouble. Picture this: The virus adds a bunch of website addresses to a blacklist in the Hosts file, essentially blocking you from accessing those sites.
So, how do you check if your Hosts file has been tampered with? For Windows users, fire up Notepad and navigate to the Hosts file, usually located in “C:/Windows/System32/Drivers/etc”. Open it up, and if it looks empty, don’t panic! Just make sure to select “All Files (*. *)” from the file type dropdown menu to reveal it.
Once you’ve got the Hosts file open, scan through it and delete any lines that start with “0.0.0.0” and don’t have a “#” sign in front of them. Save the file (Ctrl + S), restart your computer, and voila! Your Hosts file should be back to normal.
For Mac users, it’s a similar process. Open up the Terminal and enter the command “sudo nano /etc/hosts”. Make your edits, save the file by pressing Control + O, and you’re good to go.
So, keep an eye on that Hosts file; it’s your first line of defense against sneaky internet shenanigans!
Solution #5: Turn-Off Firewall

A firewall acts as a security guard for your network, deciding what traffic gets in and out based on preset rules. It’s like a barrier between your trusted network and the wild, wild internet, keeping out the bad stuff and allowing only the good stuff through.
But sometimes, these rules can get a bit too strict or messed up, causing issues with your network connection. In those cases, turning off the firewall temporarily can help figure out if it’s the culprit.
For Windows users, here’s how to do it:
- Go to the Start menu and search for “Windows Defender Firewall”.
- Select “Windows Defender Firewall with Advanced Security”.
- In the window that pops up, click on “Turn Windows Defender Firewall on or off” on the left side.

- Choose to turn off the firewall for both private and public networks.
- Click “OK” to save your changes.
You might get a prompt asking for permission—just click “Yes” to proceed.
For macOS folks, the steps are a bit different:
- Click on the Apple menu and go to “System Preferences”.
- Open up “Security & Privacy”.
- If needed, unlock the settings by clicking on the padlock icon and entering your admin password.
- Select the “Firewall” tab.
- Hit the “Turn Off Firewall” button to disable it temporarily.
- Confirm the action if prompted.
After you’ve done your troubleshooting, make sure to restart your computer, and don’t forget to turn the firewall back on to keep your network safe and sound. Just head back to the same spot and hit “Turn On Firewall”.
Solution #6: Temporary Disable Antivirus
Antivirus software is like having a trusty knight guarding your computer, armored up and ready to fend off all sorts of digital nasties like malware and viruses. But even the best defenders can sometimes get a bit trigger-happy and mess with your connections.
Every now and then, your antivirus might mistake perfectly harmless network connections for something sinister, setting off alarms and throwing up unnecessary roadblocks. When that happens, it’s time to play detective and see if temporarily disabling the antivirus fixes things.
By hitting pause on your antivirus for a bit, you can figure out if its overprotective nature is what’s stopping you from getting online. This move lets you zero in on the antivirus as the potential troublemaker, making troubleshooting a lot easier.

Solution #7: Resetting Chrome Profile Settings
Ever feel like your browsing experience has gotten a bit wonky? Well, fear not, because resetting your Chrome profile settings might just be the magic potion your browser needs!
So, what’s this reset all about? Essentially, it’s like hitting the ‘undo’ button on all those tweaks and twiddles you’ve made to Chrome over time. You know, like changing your homepage, decking it out with themes, or tinkering with those advanced settings that make you feel like a tech wizard. Sure, these customizations jazz up your browsing, but sometimes they can cause more trouble than they’re worth—think slowdowns, crashes, or websites giving you the cold shoulder.
By hitting that reset button, you’re wiping the slate clean and sending Chrome back to its factory settings, as if it just rolled off the assembly line. Say goodbye to extensions and themes, wave adieu to your startup pages and search engines, and watch as temporary data like cookies and cache vanish into thin air. But fear not! Your precious bookmarks, browsing history, and saved passwords remain safe and sound, snug in their digital beds.
- To kickstart the process of resetting your Chrome profile settings, fire up your Google Chrome browser. Then, cruise on over to the address bar perched at the tippy-top of your browser window.
- Once you’re there, punch in this address: “chrome://settings/resetProfileSettings” — no need for the quotation marks. Hit that Enter key on your keyboard like it owes you money.
- Boom! Chrome will whisk you away to the reset option tucked snugly within the browser settings. No more wading through endless menus; it’s a straight shot to the reset functionality.
- Now, inside the reset option, keep an eye out for a button labeled “Reset”. Just give that bad boy a satisfying click to kick off the reset process.
- Once you’ve given the green light, Chrome will get down to business and reset your profile settings back to square one. This might take a hot minute, depending on how tricked out your browser is and how speedy your internet connection behaves.

Solution #8: At Last, Update Network Drivers
To fix the “ERR_CONNECTION_TIMED_OUT” error once and for all, you’ll want to give your network or Wi-Fi card drivers a good ol’ update. Outdated or wonky drivers can throw a wrench into your connectivity, causing timeouts when you’re trying to get online. Upgrading your drivers ensures that your network hardware is firing on all cylinders and can nip those pesky errors in the bud.
For folks rocking Windows, here’s the game plan: head over to the manufacturer’s website and snag the latest drivers for your network or Wi-Fi card before diving into the update. Here’s how to do it:
- Download Drivers from the Manufacturer’s Website:
- Cruise on over to the official website of your network or Wi-Fi card’s maker.
- Find your way to the support or drivers section and scout out the newest drivers for your specific model.
- Grab that driver setup file and bring it on home to your computer.

- Open Device Manager:
- Tap the Windows key + X on your keyboard to summon the Power User menu.
- Pick out “Device Manager” from the lineup.
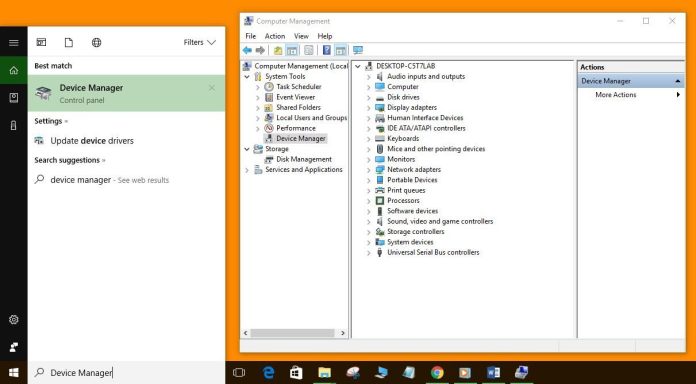
- Locate Network Adapters:
- Inside Device Manager, give a click or tap to expand the section labeled “Network adapters” by hitting the arrow next to it.
- Uninstall the Current Driver:
- Right-click on your network or Wi-Fi card and choose “Uninstall device” from the options.
- Confirm the uninstall if your computer gives you a nudge.
- Install the New Driver:
- Navigate to wherever you stashed that driver setup file.
- Give it a double-click to launch the installation wizard.
- Follow the prompts on your screen to get that fresh driver software up and running.
- Restart Your Computer:
- Once the installation wraps up, give your computer a well-deserved reboot to lock in those changes.
By snagging the drivers straight from the manufacturer’s site and then giving the boot to the old driver via Device Manager, you’re ensuring that you’ve got the latest and greatest drivers for your network or Wi-Fi card.
Suggested Articles:
- What Is a Network Driver, And How To Install It?
- WiFi Driver – What It Is & Why We Need It, And Mainly How To Install It?
- How To Uninstall Drivers From Windows Operating System?


