


 & HDD (Hard Disk Drive)?")


In the world of tech enthusiasts and IT buffs, being able to whip up a bootable USB Flash Drive using a good old CMD Command Prompt is pretty much a must-have skill. Imagine this: You’re in a tight spot, needing a portable fix to install or patch up your operating system.
Having your installation media right there on a small, USB Bootable Device? Priceless convenience. This method is gold when you don’t feel like relying on some third-party software; it’s like taking the wheel of your system admin duties.
But hey, heads up: This trick is mainly for Windows Installation Media. If you’re looking for more fancy bootable stuff, like deploying Hiren’s BootCD or similar tools, it’s smarter to turn to specialized tools like Rufus, Yumi, or WinToFlash. Still, becoming a master of crafting bootable USB drives through the command line? That’s like wearing a badge of technical wizardry and self-reliance.
So, let’s dive into the nitty-gritty of this command-driven method, unlocking the potential to turn ordinary flash drives into versatile sidekicks for your computing escapades. Get ready to flex your muscles with CMD Command Prompt as we set sail on a quest to conquer bootable USB creation with style and precision.
#So, Let’s Make A Bootable Flash Drive By CMD
- Prepare Your Environment:
- Ensure your computer is running on the Windows operating system.
- Have your Windows setup files readily available on your computer for bootable transformation.
- Launch CMD Command Prompt:
- Open CMD Command Prompt as an administrator to bypass security restrictions.
- You can access CMD Command Prompt through various methods, such as the Start menu search or using the “Run” dialog box.
- 20 Different Ways To Open CMD On Your Computer

- Access Disk Management Utility:
- Input the command “diskpart” in the CMD window and press Enter to enter the Disk Management Utility.
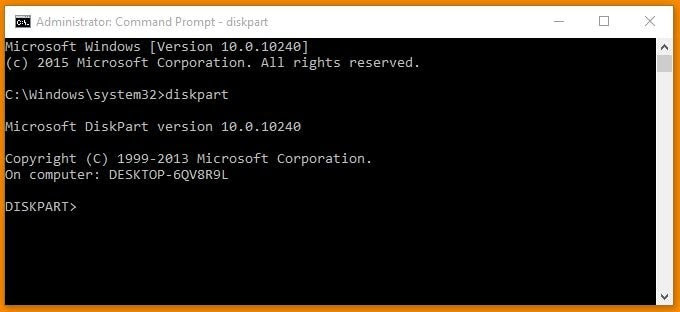
- Input the command “diskpart” in the CMD window and press Enter to enter the Disk Management Utility.
- Identify and Select Your Pendrive:
- Type “list disk” to display all connected disks and identify your Pendrive’s disk number.
- Enter “select disk #” (# represents your Pendrive’s disk number) to choose your Pendrive and mark it as active for bootable adjustments.

- Execute Essential Commands one by one:
- “clean” to wipe the Pendrive clean.
- “create partition primary” to create a primary partition on the Pendrive.
- “select partition 1” to select the created partition.
- “active” to mark the selected partition as active.
- “format fs=ntfs quick” to format the partition with the NTFS file system quickly.
- “assign” to assign a drive letter to the Pendrive.
- “exit” to exit the Disk Management Utility.

- Complete the Process:
- Once these commands are executed successfully, the CMD process is complete.
- Proceed with any additional steps necessary for your specific bootable requirements, such as copying boot files onto the flash drive.
Now that your pendrive is fully bootable, the last step is to transfer your Windows Setup files onto it. You’ve got a few options to do this smoothly:
- Transfer from Computer’s Drive to USB: If you’ve got all the Windows setup files stored on your computer’s drive, simply copy and paste them onto the flash drive. This method makes for a straightforward transfer straight from your local storage to the USB device.

- Transfer from Windows Installation Disc to USB Pendrive: Use your Windows installation disc to transfer the setup files to the flash drive. Pop the installation disc into your computer’s optical drive and copy the necessary files onto the flash drive. This method is perfect for folks with a physical copy of the Windows installation disc.

- Transfer from ISO Disk Image to USB Pendrive: Alternatively, if you have an ISO disk image of your bootable Windows setup, you can extract the files directly onto the flash drive. Mount the ISO image using virtual drive software or extract its contents using extraction tools, then copy the extracted files onto the flash drive. This approach is handy for those with a digital copy of the Windows setup in ISO format.

By picking one of these three options, you can efficiently transfer the required Windows Setup files onto your flash drive, completing the bootable transformation process. Whether you go with files from your computer, a Windows installation disc, or an ISO disk image, the result is the same: a fully functional bootable Pendrive ready for use in system installations or repairs.
#A Useful Tip
This step is critical: make sure you double-check to ensure you’re transferring only the essential Windows files and not just pasting the entire setup folder. If you simply copy the setup folder onto your Pendrive, it won’t boot up when you need it to. So, be diligent in selecting and transferring only the necessary Windows files to ensure successful booting from your Pendrive when necessary.

Need A Flash Drive?
Flash Drive Starts From: @Amazon US ($3.99), @Amazon UK (£2.99), @Amazon IND (₹259.00), @Walmart US ($4.99), @Newegg ($3.99).
Suggested Articles:
- Make Bootable USB Flash Drive By “Rufus”
- Make Bootable USB Flash Drive By “WinToFlash”
- Create A Multi-Bootable USB Flash Drive Using YUMI
- Best Bootable “Utility Tools Kit ISO” For USB Flash Drive Or CD
- What Is “Hiren’s Boot CD” And How To Make It Useful For Yourself?
- How To Make A Bootable CD, DVD & Blu-Ray Disc?
- Boot Sequence/Order/Priority Configuration of UEFI BIOS
- Configure Boot Sequence/Order/Priority in OLD CMOS BIOS SETUP
- Quick Boot USB or CD/DVD Directly From Boot Menu: Step-By-Step Guide
 Till November 2018")


 Till November 2018")
 Till November 2018")

Disk partition has encountered an error: Access is denied.
always use cmd as administrator 🙂
Okay, got the error!
Thank you bro!
thank you very much for the tutorial. I was able to successfully format the drive. However I am still confused on extracting the windows 7 install disk data to it. Can I simply browse the contents and drag and drop the files to the pendrive? or do I have to actually extract the files via winrar?
You can do both, the main purpose is to paste the installation setup data into the pen drive.
okay, that is what I thought and what i did, but unfortunately I couldn’t then get the drive to boot.
Maybe you did something wrong.
Hi there,
Nice article and thanks for sharing.
keep it up 🙂
Thanks buddy..!! Its working.!! This information is very useful..!!
Hi there,
Good article. It’s really helping a lot.
Hi
My DVD driver is not working, Please tell where will I find these windows setup files
to copy and paste on my usb.
sorry but I can’t provide you the link,
try to search it on google.
Well taught. After reading through, I finally managed to convert my pendrive into bootable media. Thank you very much for your help!
what after this…should i restart the pc and then i will see booting options from pd after restart ..also if i have removed the pd from pc..do i again need to perform cmd steps again after connecting to pc
just boot the pen drive now
bahut badhiya tips bro
Thanks For your post. its working
i had downloaded hiren zip folder from hiren official site but insidale could not got any iso…
try it again.
Very clear my friend!!!! Thanks for sharing 🙂
not show disk no 2 what is problem
Try to change the USB port.
Hi, After making PD as bootable, and transfer Window 10 to PD … it shows “install.Wimbledon does not exist.
Kindly suggest on this asap.
Need to install win 10 on my another lappy.
Try to use different setup files.
Thanks, you made my day.
after exit command command prompt is closed. Now how would i go through the next steps
how to do unbootable pen drive
By Formating it.
This process is so helpful, if anyone try to implement, please follow this process And please keep sharing this type of information which helps us.
Such a great trick.
while paste the set-up its showing destinaton error and in bootable usb drive and not paste the whole set-up in pendrive
it is a very unique idea to implement it on cmd prompt, as it is command line interpreter, and in cmd you may easily fix the range of your USB pendrive bootable.
Thanks for the best bootable tutorial.
This post is very important to the bookable USB pen drive by using the command line. which is very important to the any TV. The pen-drive is very important to me. I am using the best USB port. so, it is very helpful for us. I am suing the best Apple TV and it is working very fine and In this, I connect the USB port.
There is a process to make bootable pendrive:
Open your Windows Cmd Command Prompt and run it as administrator for typing commands on it. I only suggest you to open cmd as administrator because the current user command prompt version won’t work because of some administrator security reasons.
this post really helpful for me ..Well educated. In the wake of perusing, I at last figured out how to change over my pendrive into bootable media. Much thanks for your assistance!
“The selected disk is not a fixed MBR disk.” What shoul I do??
Try to format it with the Windows first.
what if i dont have dvd wr..?
use; https://www.deskdecode.com/how-to-use-rufus-to-make-usb-pendrive-bootable/
Accidentally cleaned the HDD any way to recover data?….help needed ASAP!!!
I am looking for the same kind of information on the website and I really found your article is informative. Keep writing an amazing article and I would love to share with my friends and family.
I followed the instructions but am getting an error message when I try to boot from the USB, “An operating system wasn’t found. Try disconnecting any drives that don’t contain an operating system”. What did I do wrong?
Hi, very good article
Thanks for sharing keep up the good work.
Tanks for advise the bootable pendrive ….