


 & HDD (Hard Disk Drive)?")


Ah, diving into the convoluted world of Windows, stumbling upon the mysterious Kmode Exception Not Handled error feels like trying to find your way through a digital labyrinth with no GPS. It’s that cryptic message that pops up when the intricate dance of kernel-mode programs hits a dead-end.

Imagine this: the kernel mode, that VIP section nestled within your CPU’s core, where all the crucial operating system functions happen. But in the midst of this digital symphony, one wrong move can unleash chaos—a kernel-mode program grappling with an exception it just can’t handle.
This error, with all its ominous vibes, signals trouble brewing deep within your system. Basically, it means some kernel-mode bigwig, whether it’s a loyal Hardware Driver or a trusty system service, has hit a roadblock it can’t overcome. The suspects lurking in the shadows of this digital realm are plenty: from sneaky software bugs hiding in lines of code to the dreaded hardware malfunctions messing with your system’s core. It’s a delicate balance disrupted by software components duking it out for supremacy.
When this error pops up, it’s like your computer screaming for help. It warns of a rocky road ahead—system instability, crashes waiting to happen, and the nightmare of losing precious data.
But fret not! The troubleshooting toolbox holds the key to navigating this treacherous terrain. Maybe it’s updating those device drivers, playing detective to spot hardware hiccups, or going on a malware hunt to fend off digital invaders. And if all else fails, Windows’ own recovery options are there to patch up the cracks in your digital fortress. So, armed with knowledge and determination, let’s embark on this quest to conquer the mystery of Kmode Exception Not Handled and bring order back to our Windows kingdom.
Quick Tip
Experiencing that dreaded error message popping up during your computer’s startup? Well, fear not! I’ve already tackled similar issues in an article aptly titled “Fixing Blue Screen (BSOD) Error In Middle of Computer Startup“. Feel free to give it a read for a comprehensive guide on troubleshooting those pesky BSOD bugs that rear their ugly heads during boot-up.
So, Let’s See How to Fix Kmode Exception Not Handled In Windows 11, 10, 8 & 7
So, you’ve recently decked out your computer with some snazzy new hardware upgrades, huh? Well, if you’ve been running into some pesky issues lately, especially right after those upgrades, I’ve got a nifty troubleshooting tip for you: try stripping it down. Yeah, I’m talking about taking off those fancy additions you’ve just slapped on and see if the problem magically disappears. If it does, give yourself a pat on the back because you’ve just unmasked the troublemaker.
Think of it like this: if removing the recent hardware fixes the problem, it’s like catching incompatible drivers having a spat at a Windows version party. They just couldn’t see eye to eye.
On the flip side, if you’re only getting the error when using a specific software application, maybe that program just needs a breather. Try giving it a clean reinstall or, if you’re feeling fancy, upgrade to the latest version. It’s like sending your software on a spa day, smoothing out any wrinkles in its relationship with your operating system.
Now, sometimes your operating system might run into a Kmode error while installing or running external USB device drivers, leading to that dreaded BSOD (Blue Screen of Death) appearance.
A simple troubleshooting step you can take is to unplug all those USB buddies from your desktop or laptop and start fresh. Strip it down to the basics, like your good ol’ mouse and keyboard. Let your computer breathe without all those unnecessary peripherals and see if the BSOD keeps haunting you.
And when I say “remove USB”, I mean unplug and disconnect all USB-connected devices like printer cables, scanner cables, webcam cables, external hard disk drive cables, etc., except for your trusty mouse and keyboard.
If the BSOD seems to fade away after ditching some USB devices, it suggests a potential driver issue with one or more of your connected hardware. In that case, start reconnecting one USB device at a time and keep an eye out for errors. If everything seems hunky-dory, move on to the next USB device and repeat until you pinpoint the troublemaker. Once you’ve got it, reinstall the drivers specific to that hardware component. Easy peasy, right?
Troubleshooting Drivers Related Issue
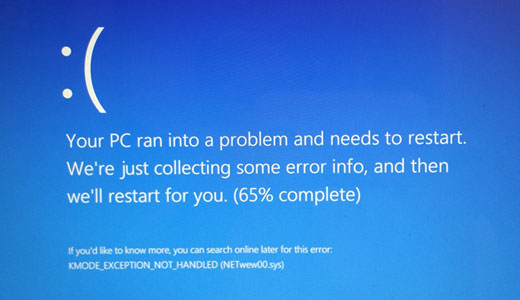
In about 80% of cases where this error shows up, it’s usually because of driver issues, which can be incredibly frustrating. But here’s the good news: you can often play detective and figure out which driver is causing the problem. Just look for the file name that comes with the error message—it’s usually shown right next to it and looks something like ‘xxx.sys’ or ‘xyz.sys’.

Alright, so here’s the deal: if you’re staring at the dreaded BSOD (Blue Screen of Death) and it’s not dropping any hints about which driver is causing the chaos, the usual steps we’ve talked about might not cut it. In those frustrating moments, it’s probably time to give this tutorial a rain check and go scout for a more thorough guide listed below that can tackle this mess head-on.
If you’ve successfully identified the name of the problematic driver, the next step involves delving deeper to gather additional details about it. Navigate to the ‘Online Drivers Directory’ to access comprehensive information regarding the troublesome driver.
Drivers Directory Link: opendll.com/index.php
To utilize the website for driver information, follow these step-by-step instructions:
- Access the Drivers Directory: Click on the provided link, which will direct you to a comprehensive Drivers Directory.
- Search for the .sys Driver File: Utilize the website’s search function to input the .sys driver file name you identified earlier. For instance, if the problematic driver’s file name is “rtwlane.sys”, enter it into the search bar.

- Retrieve Driver Information: Upon conducting the search, the website should present detailed information about the driver, including its full name or description. This information provides insight into the driver’s function and purpose.
Let’s consider an example scenario. Suppose you’re grappling with the driver file “rtwlane.sys”. A search on opendll.com might unveil that it pertains to a network-related driver causing the issue, as depicted in the accompanying image.

Understanding the full name and description of the driver equips you to make informed decisions regarding how to address the problem. Whether it entails updating the driver, seeking assistance from the manufacturer, or exploring alternative solutions, having comprehensive information about the driver is imperative.
Reinstall or Update Drivers
So, you’ve taken a peek into the nitty-gritty details of your driver files nestled in their directory, and guess what? You’ll stumble upon two main types: hardware-related drivers and Windows-related drivers.
- Let’s kick things off with Hardware-Related Drivers. These are the ones cozying up to specific hardware components like your graphics cards, network adapters, or sound card. If you spy a driver linked to a particular hardware brand like Intel, Atheros, Realtek, and the gang, it’s like a little red flag waving at you. It hints that there might be some compatibility, functionality, or performance issues with that specific hardware device.
- Next up, we’ve got the Windows-Related Drivers. These are the unsung heroes of the Windows Operating System, quietly facilitating communication between your OS and all your hardware pieces. If your detective work reveals a driver affiliated with Microsoft, well, you’ve got yourself a Windows-related driver. These drivers are like the invisible glue holding the Windows environment together, making sure everything runs smoothly.
Here is a compilation of the most frequently encountered driver files that result in this blue screen error.
| Error Causing Drivers File Name | Drivers Type | Description |
| acpi.sys | Windows-Based | ACPI Driver for NT |
| afd.sys | Windows-Based | Ancillary Function Driver for WinSock |
| classpnp.sys | Windows-Based | SCSI Class System Dll |
| cng.sys | Windows-Based | Kernel Cryptography Next Generation |
| dxgkrnl.sys | Windows-Based | DirectX Graphics Kernel |
| dxgmms2.sys | Windows-Based | DirectX Graphics MMS files |
| fltmgr.sys | Windows-Based | Microsoft Filesystem Filter Manager |
| hardlock.sys | Windows-Based | Hardlock Device Driver for Windows NT |
| iastora.sys | Hardware-Based | Intel Rapid Storage Technology driver |
| igdkmd64.sys | Hardware-Based | Intel Graphics Kernel Mode Driver |
| intelppm.sys | Windows-Based | Processor Device Driver |
| ks.sys | Windows-Based | Kernel CSA Library |
| mfehidk.sys | Windows-Based | Host Intrusion Detection Link Driver |
| ndis.sys | Windows-Based | NDIS 6 30 driver |
| ndu.sys | Windows-Based | Windows Network Data Usage Monitoring Driver |
| netio.sys | Windows-Based | Network I O Subsystem |
| netwtw04.sys | Hardware-Based | Intel® Wireless WiFi Link Adapter |
| ntfs.sys | Windows-Based | NT File System Driver |
| nvlddmkm.sys | Hardware-Based | NVIDIA Windows Kernel Mode Driver Version 302 86 |
| partmgr.sys | Windows-Based | Partition Management Driver |
| rt640x64.sys | Hardware-Based | Realtek packet filter driver |
| rtux64w10.sys | Hardware-Based | Realtek USB FE/1GbE/2.5GbE NIC NDIS6.40 64-bit Driver |
| storport.sys | Windows-Based | Microsoft Storage Port Driver |
| tcpip.sys | Hardware-Based | TCP IP Driver |
| usbport.sys | Hardware-Based | USB Port Driver |
| win32kfull.sys | Windows-Based | Full/Desktop Win32k Kernel Driver |
Now, depending on the classification of the driver, different steps need to be taken to fix the issue.
Method #1: Fixing Windows-Based Drivers
If you’re stuck in the maze of this pesky error, feeling like it’s playing a game of hide-and-seek with your Windows drivers, don’t panic. The secret to getting out of this mess quickly? Facing those recent Windows updates head-on.
Let’s talk about the not-so-great side of computer systems: automatic updates. While they’re meant to make things easier for us, they can sometimes throw a wrench in the works. Imagine this: your computer decides to update out of the blue, and suddenly, chaos ensues.
Here’s the deal: if you’re having issues after an automatic update, it might be because it clashes with your existing drivers. Nobody likes surprises, especially when they come in the form of tech problems. To fix it, dig into your update history and find the troublemaker. Once you’ve figured it out, take action—get rid of the update causing the chaos.

On the other hand, if your computer has been running without updates for a while, it’s time to step in and do something about it. Don’t let your system get stuck in the past—take the lead and check for any available updates. It’s a simple but crucial step.
Keeping your Windows operating system up to date is like giving your computer a powerful boost of vitamins. It ensures that your system stays safe, steady, and ready to handle the latest software upgrades with ease. Think of it as a form of self-care for your tech, ensuring it stays in top-notch condition.
Now, let’s run a diagnostic test. Did the problem disappear? If yes, then hooray! Time to celebrate your win. If not, don’t worry—you’re on the right track to uncovering the elusive root cause.
In addition to relying on Windows updates to keep your system healthy, you have some powerful tools right within the Command Prompt (CMD) to tackle any lurking issues in Windows’ internal files. Let me introduce you to two command-line superheroes: “sfc /scannow” and “DISM /Online /Cleanup-Image /RestoreHealth”.
Now, let’s dive into what these commands can do:
- The “sfc /scannow” command unleashes the System File Checker (SFC) tool, which acts as your computer’s personal detective. It meticulously scans protected system files for any signs of corruption or absence. When it detects any discrepancies, it takes proactive measures to repair and restore files to their original state. Think of it like a thorough check-up for your crucial Windows files.

- Moving on to the second command, “DISM /Online /Cleanup-Image /RestoreHealth”, this one functions as a wizard within the Deployment Image Service and Management Tool (DISM). It serves as your solution for addressing more complex issues related to Windows image corruption. By conducting a comprehensive scan and restoration of the Windows image, it delves deep to rectify underlying system file problems, ensuring everything remains intact and operational.

When you execute these commands within the Command Prompt, you’re actively contributing to the maintenance of your Windows operating system. It’s like taking on the role of your computer’s personal trainer, ensuring it stays strong, stable, and efficient. These manual techniques are invaluable when dealing with stubborn issues, providing you with a versatile toolkit to keep your Windows system in pristine condition.
Method #2: Fixing Hardware-Based Drivers
Alright, so you’ve pinpointed the driver file linked to that pesky hardware component causing you grief in your system. Now, it’s time for the next big move: reinstalling the driver. This step is like giving your system a little tune-up, ironing out compatibility kinks, ensuring top-notch performance, and squashing any bugs from outdated or wonky drivers.
To kick off this process, head over to the official website of your laptop or desktop maker. Once there, dive into the support or downloads section, and hunt down the right driver for your troubled hardware. Make sure you snag the latest version to keep your system in tiptop shape and nip any potential issues in the bud.
- 4 Different Ways To Find Your Desktop Or Laptop’s Model Number
- 4 Different Ways to Find Your Motherboard’s Model Number

So, you’ve got the shiny new driver ready to roll. Now, it’s time to bid farewell to the old one. Head over to your Windows system’s Device Manager, find that troublesome hardware device, right-click on it, and hit “Uninstall”. Once that’s done, give your computer a good ol’ restart to seal the deal and wipe out the old driver for good.

Now, onto the exciting part – installing the new driver. Just follow the manufacturer’s installation instructions, usually involving running an installer or setup file and following the prompts that pop up on your screen. Once everything’s installed, it’s time for another reboot to make sure all the changes take effect.

Why all the fuss, you ask? Well, reinstalling drivers straight from the manufacturer’s stash not only smooths out any potential conflicts but also guarantees that your system gets the latest bells and whistles, plus all the compatibility boosts. It’s like giving your system a power-up, reducing the chances of those pesky blue screen errors crashing your party.
Suggested Articles:
Sometimes, despite your best efforts, this error decides to be a real pain in the neck, throwing you curveballs that go beyond just driver problems. We’re talking about those moments when the culprit might be something sneakier like a virus invasion, Windows registry corruption, or some other mysterious gremlin.
Now, for these more complex challenges, you’ve gotta level up your troubleshooting game. That’s where my latest article comes in handy. It’s a treasure trove of advanced techniques and solutions, specifically designed to tackle the various demons lurking behind the dreaded BSOD (that’s Blue Screen of Death, for the uninitiated), not just the run-of-the-mill driver issues.
So, if you’re ready to dive deep into the world of advanced fixes, check out my article titled “How To Fix BSOD (Blue Screen of Death)? – Every Advanced Solutions“. It’s your one-stop shop for troubleshooting wizardry, offering up detailed instructions and insider tips to help you kick those BSOD blues to the curb.

 Error in Middle of Computer Startup")


Had it on my laptop quite a lot but when I upgraded to a PC it never came up until today. I got it just now whilst watching Netflix, any ideas if that may need fixing ir if it just an uncommon error?
Same problem as above. Happened while watching Netflix.
What if it is a device like a printer that has the corrupted driver? I still need to print. How can I repair the corrupted printer driver? My printer doesn’t seem to work well with another laptop in our house also. The printer has to restart constantly, however, a third computer in our house works great with the printer.
just download the latest drivers from the internet.
my laptop jus got the blue screen it gave me no other option, what should i do then
use startup repair.
http://www.deskdecode.com/startup-repair/
first of all we should turn off fast startup. The next most important thing is updating your drivers and uninstalling cpu intensive programs. You should also clean up files to regain more space in windows 10.
a problem that used to happen to me often, thank you very much for sharing it with us, I am grateful, I will follow you closely