


 & HDD (Hard Disk Drive)?")


If you’ve stumbled upon the dreaded “SYSTEM SERVICE EXCEPTION” error code on your Windows system, don’t panic just yet! This little annoyance usually pops up when a system service encounters some unexpected hiccups or gets shut down in a not-so-graceful manner.
It’s like when your favorite coffee machine decides to act up out of the blue – you’re left scratching your head wondering what went wrong. In this case, it’s often a result of things like wonky drivers, hardware acting out, corrupted system files, or good old-fashioned software conflicts.
And oh boy, when this error decides to make an entrance, it loves to steal the spotlight with its flashy blue screen of death (BSOD), bringing your Windows adventure to an abrupt halt to prevent any further chaos.
But fear not, brave troubleshooter! There are ways to wrestle this beast back into submission. You might need to roll up your sleeves and dive into some driver updates, give your hardware a thorough check-up for any gremlins lurking in the RAM or hard drives, or even resort to a bit of time travel with a system restore to a happier, more stable time.
First, Let’s Decode The SYSTEM SERVICE EXCEPTION Error
Now, let’s talk about why this error code crash lands in the first place. Picture this: a program trying to access memory it’s got no business messing with. It’s like trying to use a key to a door that doesn’t exist, or worse, stumbling into a room that isn’t even on the map!
There are a couple of usual suspects behind this memory mayhem. First up, we’ve got the NULL pointer dereference—basically, trying to use a memory address that’s a big fat nothing, a dead end in the vast memory landscape. Then there’s the classic case of wandering into the wrong neighborhood, courtesy of a buggy program logic.
These headaches often stem from premature memory freeing—letting go of allocated memory before it’s time—or data structure corruption, where the internal frameworks start to resemble a tangled mess of spaghetti code.
The fix? Get cozy with your debugger, sift through that code like a detective on a mission, and make sure your memory management and data structures are as solid as a rock. With a little patience and some code TLC, you’ll have that error code running for the hills in no time!
Quick Tip
Are you facing that pesky “SYSTEM_SERVICE_EXCEPTION” error right as your computer fires up? Well, hold onto your hats because I’ve got just the thing for you! Check out my article titled “Fixing Blue Screen (BSOD) Error In Middle of Computer Startup” for a deep dive into troubleshooting those early boot-up blues.
But hey, today’s mission is all about dealing with that stubborn blue screen that loves crashing your computer party during regular use. It’s time to roll up our sleeves, stare that blue screen square in the pixels, and show it who’s boss! Let’s kick those blues to the curb once and for all!
Solution #1: Undo Recent Changes
Alright, let’s put on our detective hats and dive into troubleshooting mode! The first step? Playing Sherlock and sniffing out any recent changes that might’ve triggered this whole mess. We’re talking both software and hardware tweaks you’ve made lately.
Whenever you tinker with stuff like installing new software, updating the old guard, or giving your hardware a makeover, it’s like stirring the pot—things can get funky real quick, leading to those dreaded BSOD errors. So, our game plan here is to rewind the clock and undo those changes to see if we can crack this case wide open.
First up, let’s tackle the software side of things. Time to bid farewell to any new apps you’ve recently welcomed into your digital family or updates you’ve showered upon the old gang. You can do this through the trusty Control Panel or by using the uninstallation tools bundled with the software. By giving these recent additions the boot, we might just uncover the culprit behind the BSOD chaos.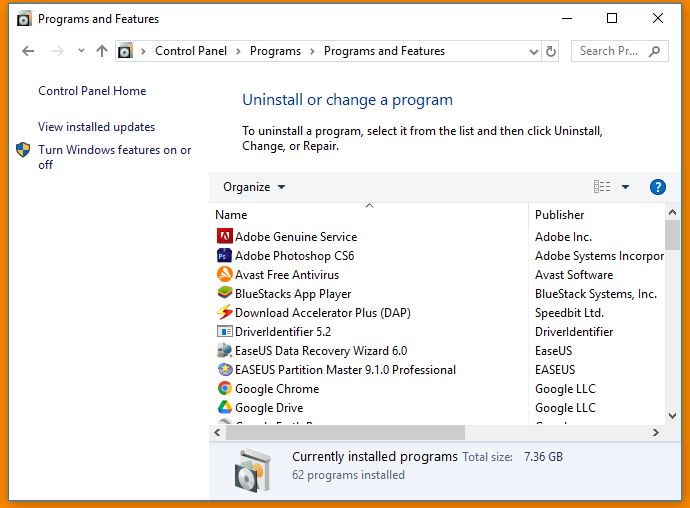
Now, onto the hardware front. If you’ve been tinkering with your rig lately, it’s time to hit the pause button. Consider temporarily evicting those newly installed components or recent tweaks you’ve made to your setup. Sometimes, a rogue piece of hardware can be the sneaky villain behind these BSOD shenanigans. So, by pulling them out temporarily, we can zero in on the troublemaker.
And hey, let’s not forget about those Windows updates. While they’re supposed to sprinkle a bit of magic dust on your system, sometimes they can clash with your setup like oil and water. Take a peek into the Control Panel and see if any recent updates coincide with the appearance of those pesky BSOD errors. If so, it might be time to bid them farewell.

Solution #2: Check OS Drive For Errors
So, you’re encountering some hiccups with your Operating System (OS) drive? No worries, we’ve got your back with the trusty old Check Disk (chkdsk) command, baked right into Windows. This handy tool is like your drive’s personal detective, sniffing out file system errors, bad sectors, and other pesky issues.
Now, let’s dive into the nitty-gritty of running a chkdsk operation:
- Open up Command Prompt: Hit the Windows key, type “Command Prompt” in the search bar, then do a right-click on Command Prompt from the search results and hit “Run as administrator.” This ensures you’re in the boss mode to run chkdsk. >> 20 Different Ways To Open CMD On Your Computer

- Time to Run Chkdsk: Once you’re in the Command Prompt window, type in this command and hit Enter: “chkdsk C: /f /r”. If your OS drive goes by a different letter, swap out “C:” with the correct one. The “/f” part tells chkdsk to fix any errors it finds, while “/r” tells it to scout for bad sectors and try to save any data it can.
- Confirm Your Intentions: Depending on whether your OS drive is currently in use, you might get asked if you want to schedule a disk check for the next system startup. Just type “Y” for yes and hit Enter.

- Time for a Reboot: If you’ve scheduled the disk check for the next boot-up, go ahead and restart your computer to let chkdsk do its thing before Windows fully kicks in.
- Patience is Key: Now, chkdsk will roll up its sleeves and give your OS drive a thorough once-over, fixing up any issues it encounters along the way. How long this takes depends on the size and health of your drive, so grab a coffee and chill for a bit.
- Check out the Results: Once chkdsk’s done its magic, it’ll give you a rundown of what it found and fixed. Keep an eye out for any error messages or problems that got sorted out during the process.
And there you have it! Your OS drive should be feeling spick and span after a round with chkdsk.
Solution #3: Perform Memory (RAM) Test
Now, let’s dive into the next big thing: running a check-up on your computer’s memory (RAM) to sniff out any sneaky problems lurking in those memory modules. These issues often hide behind various glitches and system hiccups, just like the one you’re wrestling with right now.
For a proper RAM check-up, it’s smart to enlist the help of specialized third-party software like MemTest86. This nifty tool is tailor-made to give your computer’s RAM modules a thorough once-over, making sure they’re up to snuff.
- First off, grab the ISO file from the official website and then get MemTest86 cozy on a USB flash drive or a trusty old CD/DVD. You can snag the software from its official digs and stick to the provided instructions to whip up a bootable medium.
- Now, give your computer a reboot and boot it up from that USB flash drive or CD/DVD with MemTest86 on it. The software will jump into action right away, combing through your computer’s RAM modules with a fine-tooth comb for any glitches or oddities.
- During the testing marathon, make sure to let MemTest86 do multiple laps to ensure it leaves no memory stone unturned. Depending on how much RAM you’ve got and how sprightly your system is, this might take a bit of time.
- Once the test wraps up, MemTest86 will serve up a detailed report, tipping you off if it spotted any hiccups in your computer’s RAM modules. If it does find anything fishy, it’s a sign there might be some hardware gremlins lurking about, possibly calling for a deeper investigation or swapping out those wonky memory modules.

For a step-by-step guide on how to flex your RAM-testing muscles, I’d suggest checking out the article “RAM Test: Testing PC’s RAM Is Working Properly or Not“. It’s a goldmine of detailed instructions on how to put your RAM through its paces effectively.
Solution #6: Update All Hardware Drivers

Think of ‘Hardware Drivers’ as the smooth-talking middlemen between your hardware and operating system. When they’re outdated or start butting heads with your system, it’s like inviting trouble to your digital doorstep.
Keeping your drivers in tiptop shape with the latest updates can do wonders for your system’s performance. It’s like giving your computer a spa day, fixing bugs, ironing out compatibility wrinkles, and overall just making it run smoother. A lot of those BSOD tantrums can often be traced back to outdated drivers, so keeping them fresh is key.
Now, there’s a whole lineup of drivers that might need a little TLC: your graphics card driver, network adapter driver, sound card driver, chipset driver, and the list goes on. Luckily, most manufacturers are on the ball with releasing updates to keep things running smoothly and playing nice with the latest software and operating systems.
So, how do you get your hands on these updates? Well, you could take a stroll over to the manufacturer’s website and grab them directly. Or, if you’re more of a hands-off kind of person, Windows has got your back with built-in tools to automate the update process. And if you want to kick back even more, there’s a bunch of third-party software out there ready to scan your system, find those outdated drivers, and get you up to speed with minimal effort. Easy peasy, right?
Suggested Articles:
- Install Computer Drivers Automatically For Free – DriverPack Solution
- DriverIdentifier: A Great Way To Find & Download Drivers Online
- How to Update Drivers Directly From the Device Manager?
What To Do If Nothing Works?
If none of the solutions mentioned above manage to fix the SYSTEM SERVICE EXCEPTION error on your computer, I highly recommend checking out our in-depth article titled “Fixing BSOD (Blue Screen of Death) Error: Every Possible Solution“.
In that article, we cover a wide range of potential fixes and troubleshooting steps specifically tailored to address this error. From basic troubleshooting tips to more advanced solutions, our guide is designed to give you a comprehensive understanding of how to effectively deal with the BSOD error. By following the steps outlined in that article, you’ll have the knowledge and tools needed to troubleshoot and resolve this issue, ensuring a smoother and more stable computing experience.

 Error in Middle of Computer Startup")


